Monday, May 15, 2023

How to Paint a Rock - "Transferring a Dover Flower Publications Image to a Rock's Surface"

Hi and thank you for your interest in this rock painting tutorial. This post will explain how to transfer a flower image to a rock's surface.

After the ink from the image is transferred, you can embellish the transfer with ink pens or acrylic paints to make it uniquely your own painting like the one pictured below...


In the video below I will demonstrate how to use water and a paint brush to go over the image that has been dried face down onto the surface of the rock.


Before this video begins, the rock's surface had been painted with two coats of white acrylic paint and dried before transferring the flower print (from Dover Publications).

The flower print was dried face down onto the rock's surface using the basic directions as outlined below this paragraph.

1) Print a picture of flowers from your computer from an inkjet printer. To make this easier, I have linked an article directly below outlining this process which you may want to go over before moving on to Step 2... Learn How to Find Pictures on Your Computer, Resize and Print from a WP Document 2) After reading the article directly above, use a paint brush to coat your rock's surface with white acrylic paint for the third time (it should already be coated and dried twice with the white paint). DO NOT LET IT DRY before moving on to Step 3.

3) Using a paint brush, directly coat the (inked side) printed image you are going to transfer with Mod Podge. While the Mod Podge is still wet, place the image onto the (third coat of) wet white acrylic paint (refer to Step 2 above).

So, just to reiterate... you will be using a wet coat of Mod Podge spread out onto the paper image itself and transferring it face down onto a (third) coat of wet white acrylic paint that is on the rock's surface. 4) Let the image dry thoroughly onto the rock's surface for a few hours. 5) Using a clean paintbrush and water, coat the back of the image (the non-inked side). You will see the colors of the image show through the paper.

This is what you want to happen. Let the water dry, and coat it again. Let it dry in between coats at least 6-10 more times. (Please refer to the video above to see this process demonstrated). 6) Making sure you have completed Step 5 above a few times, you will probably have already started to see the paper roll off the rock surface in small pills to reveal the ink that has dried into the white paint. 7) Regular computer paper comes in about 7 layers so this will be evident because you will see that every time you go over the surface with water that the pills, or little wet rolls of paper, will become a little larger every time. Use your index finger to very gently roll the wet paper off to reveal as much of the colorful ink as possible before you paint it. 8) Use your art markers or paints to go over the image that's been revealed and create your own unique flower painting by adding color and definition to base image. There are many ways to transfer images from paper to a hard surface. Transferring an image is fairly easy if you do it with the method in this video. Inkjet images are actually the best for this method.

If you don't have a color printer, you can also use a black and white image and refer to a picture on a computer screen for guidance on what colors to embellish your project with after it is transferred to your rock.


RELATED VIDEOS:

Fairies & Bunny Rock Painting Tutorial

The videos linked above show the method used in this tutorial but obviously are using a different image for that particular rock painting which they are from.


Please see my other rock painting tutorials by clicking on the links below...


ROCK PAINTING TUTORIAL #1 - A Basket of Pansies

ROCK PAINTING TUTORIAL #2 - Gardening Animals

ROCK PAINTING TUTORIAL #3 - Red & Orange Poppy Flowers

ROCK PAINTING TUTORIAL #4 - Little Boy in a Bunny Costume

ROCK PAINTING TUTORIAL #5 - Mama Bird & Chicks

ROCK PAINTING TUTORIAL #6 - Fairies & Bunny Spring Rock

ROCK PAINTING TUTORIAL #7 - Beach Bunnies Family Rock

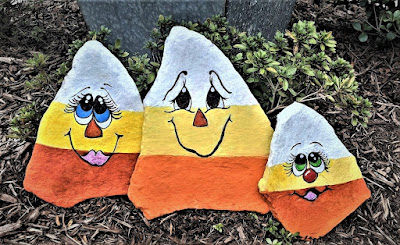
ROCK PAINTING TUTORIAL #8 - The Candy Corn Family

ROCK PAINTING TUTORIAL #9 - Daffodils Rock

ROCK PAINTING TUTORIAL #10 - Fairies & Daisies

ROCK PAINTING TUTORIAL #11 - Strawberry Fairy Rock

ROCK PAINTING TUTORIAL #12 - How to Paint a Flower Rock Using a Coloring Book Page

ROCK PAINTING TUTORIAL #13 - Daisy Flower Rock

ROCK PAINTING TUTORIAL #14 - Stained Glass Angel Theme


You might find the videos linked below very helpful...

RELATED VIDEOS about transferring an image to a rock with Mod Podge:


Gardening Animals Rock - PART 1
"Transfer an Image with White Paint and Mod Podge"


Gardening Animals Rock Painting - PART 2
"Revealing the Image"


Gardening Animals Rock Painting - PART 3
"Using Paint Markers to Apply Color"


Gardening Animals Rock - PART 4 -
"Adding Stenciled Flowers to Outer Edges of your Rock Painting”


Gardening Animals Rock - PART 5 -
"Adding Color to Your Rock Using Paint Pens & Sharpies"


“How to Make Wax or Freezer Paper Sheets to Print from your Computer”


Please visit my other blogs by clicking the link under each picture below...


Hand-Painted Rocks


Hand-Painted Flower & Fairy Rocks


Sunday, February 12, 2023

ROCK PAINTING TUTORIAL #17 - "Hummingbirds Rock"

Hi there and thank you for your interest in this rock painting tutorial on how to paint hummingbirds and flowers onto a rock (pictured below)...


To make the rock pictured above I used a picture of colorful hummingbirds that I found on PINTEREST.  I then simply transferred the picture onto a rock and added color with paint markers.

Here is the picture I used for this project...

Hummingbird picture found on
Pinterest which was used for
this rock painting. 


If you would like to make a rock like the one in this tutorial, follow the DIRECTIONS as outlined below on this page.

(In addition to the outlined directions on this page below, please feel free to click the underlined links throughout this page to learn more about each subject underlined.  As a disclaimer, if you do purchase anything through an affiliate link, I will earn a small commission at no cost to you.)

purchased the rock used for this painting at a stone center near my home.  Most towns have a stone center nearby.

Here is a picture of the "misfit pile" at my local stone center...

Misfit pile of rocks at my local stone center
contain broken pieces that come in all shapes and sizes.


If you would like to find a stone center near you, here is a link to an article I wrote, entitled "Gathering Supplies and Where You can Find Rocks to Paint" which can help.

A stone center is a great place to find rocks for rock painting for a few reasons.   They are fairly clean as rocks go, they come in all shapes and sizes, and the stone center will usually sell to the public at a discounted rate too.

For example, I just purchased eight large rocks at my local stone center for about $20.  Eight large floral rock paintings can be sold for close to $50 each (or more!).  If you do the math, you can see how this can turn the wonderful hobby of rock painting into a business.

As a little safety tip for you, when you go to the stone center wear gloves, long pants and closed toed shoes so you don't hurt yourself as you go through the rock piles in your search.

You can also purchase rocks that are ready to be painted on Amazon now!  The rocks you can purchase online are probably somewhat smaller than the ones you will find at a stone center, however they do have a variety of smaller sizes online.  Click the link under the picture below to learn more...


The rocks pictured above are great for smaller painted rock projects like the ones in the picture below...


Before we begin, you will need an image to trace onto your rock, so please read the following article linked below to learn how to get an image for your rock painting...


Read the article in the link above to find an image like the one I used for this hummingbird rock painting tutorial...

Please note that the image is printed in the same direction as it will be used face up during the tracing process.  Again, all of this is explained in the article linked above about how to get images to use.   Here is another link to that article for your convenience.

After you have your image and gathered some supplies, we're ready to begin!


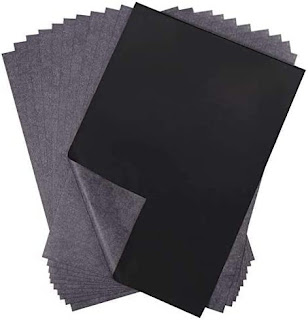
You will need some kind of
carbon paper (shown above) to 
place between the rock
 and the image to be traced.


DIRECTIONS


1. 
 Paint your rock with two coats of white acrylic paint.  Let it dry thoroughly.  The reason you paint the rock white is to make the lines and colors pop.   You can color in the background later.


Rock painted with white acrylic paint
before tracing image


2.  Following the instructions on the package, place the transfer paper on the surface of your rock (which has been painted and dried with white acrylic paint), then lay the printed peacock image of your choice right side up over the transfer paper.  The transfer paper should now be positioned between the rock and the printed image (use a laser printer).


Secure both papers with Scotch tape and trace the 
hummingbird image with a blue or red pen so that it will
 be easy to see the lines that have already been traced.

The Scotch tape holds the image in
place to keep it from moving while
being transferred to the rock.
Ready to trace!

_______________________________________________________________________


_______________________________________________________________________


3.  You can use a variety of acrylic paints to add color to your rock painting.   I like to outline my transferred images with a extra fine point black Sharpie to get good definition of the lines before I start painting or coloring with my acrylic paints or markers.

4.   Using paint brushes with acrylic paints, paint pens, or permanent markers, add color to the outline of the hummingbirds and flowers...

The hummingbird image outlined with
an extra fine black Sharpie and with 
some color added. 


_______________________________________________________________________

King Zap
Reviewed in the United States 🇺🇸 on February 13, 2023
Style: 12 Extra-Fine Tip
Kristina
5.0 out of 5 stars Love them!
Reviewed in Canada 🇨🇦 on May 7, 2020
Style: 12 Extra-Fine Tip

_______________________________________________________________________


 5.  Once the ink is dry, you may want to go over any outlines with an extra fine black Sharpie pen and give it a touch up.  Seal your rock with a weather resistant acrylic sealant following the directions on the can.

6.   You can display it in your own home, give it to someone as a gift, or sell it on a site like Etsy.  I hope you enjoyed this rock painting tutorial and please subscribe to my Youtube channel for more craft tutorials!


Be creative & be happy!


Trace & Paint Flowers


Graphite Paper


Rocks for Painting


Mod Podge Matte Gel Medium

Painting Flowers on Rocks 

White acrylic paint

Paintbrushes

Arteza Paint Pens

Sharpie Permanent Markers

Sharpie Ultra Fine Black Marker (for outlines) 

Art Markers

Shuttle Art Markers

Deco Art White Paint Pen

Paint Markers

 ____________________________________________________

Supplies Side note:   Not all the above products will be needed for this particular tutorial. I have linked to some supplies that I use in my rock paintings so that you can have access to some of my favorite products, but you can find most of these in your local craft store.


Here are the links to other rock painting tutorials on this blog:

ROCK PAINTING TUTORIAL #1 - A Basket of Pansies

ROCK PAINTING TUTORIAL #2 - Gardening Animals

ROCK PAINTING TUTORIAL #3 - Red & Orange Poppy Flowers

ROCK PAINTING TUTORIAL #4 - Little Boy in a Bunny Costume

ROCK PAINTING TUTORIAL #5 - Mama Bird & Chicks

ROCK PAINTING TUTORIAL #6 - Fairies & Bunny Spring Rock

ROCK PAINTING TUTORIAL #7 - Beach Bunnies Family Rock

ROCK PAINTING TUTORIAL #8 - The Candy Corn Family

ROCK PAINTING TUTORIAL #9 Daffodils Rock

ROCK PAINTING TUTORIAL #10 - Fairies & Daisies 

ROCK PAINTING TUTORIAL #11 - Strawberry Fairy Rock

ROCK PAINTING TUTORIAL #12 - Fairies & Bunny Spring Rock

ROCK PAINTING TUTORIAL #13 - Daisy Flower Rock

ROCK PAINTING TUTORIAL #14 - Stained Glass Angel Theme

Coffee Mug - Rock Painter Mug


Some of my PINTEREST boards that may interest my crafty friends:

Hand Painted Rocks by nancymaggielee

Stained Glass Painting & Glass Crafts

Rock Art 

Illustrations & Drawings  

Image Transfer 

Watercolor Clip Art 

Sharpie Crafts


T-Shirt for your favorite rock painter
available on Etsy


_______________________________________________________________

Please visit my other blogs (click link below each blog's cover picture)...


You can now buy rocks online!

You can now buy rocks online!
These are great for a rock painting party! (click on picture)