In this tutorial I will be teaching you how to download a fairy coloring bookpage into a word processing document so that the image can be traced onto a rock. When this project is complete, you should have a rock painting similar to this one in the picture below...
Strawberry Fairy Rock by nancymaggielee
Once you download the fairy image to word processing (using a copy and paste method outlined in the directions below), you can resize it and print it out so that it can be traced onto the surface of a rock.
Since the method of transfer, we will be using for this rock painting tutorial, you can, of course, buy a fairy coloring bookto use in this project. However, if you would like to find free fairy mages that can be traced onto a rock's surface, the instructions are outlined step by step in the DIRECTIONS below.
1. First you will need an image to trace. To find a free fairy imageto trace, log on to Pinterestor go to your favorite search engine like Duck Duck Go.
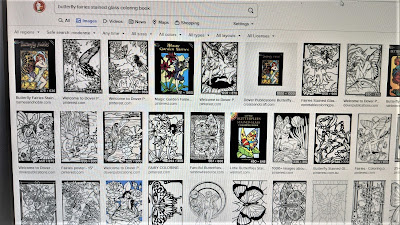
Search results in Duck Duck Go for 'butterfly fairies stained glass coloring book page' (Select 'Images' under the search bar)
3. Using your mouse, hover over the fairy image you would like to use for your fairy rock painting and 'left click' over the picture. It will appear larger at the top of the screen.
4. Now, hovering over the larger version of the fairy image at the top of the page, use your mouse and 'right click' over the image. Select 'Copy image' from the choices (see this outlined in the picture above in Step 3).
5.In another window, open up a blank word processing document and select 'Paste'. Now your image will appear in the word processing document.
6.To resize your image to fit your project, simply hover over the picture in the WP document and 'left click' on the corner. A black line will appear around the image (see PART 2 video below). With your mouse on the image's corner, move it back and forth to make it bigger or smaller. The picture on the screen will be true to size for your project, so now you can hold your canvas up to the screen to see how large or small you need it to be.
Watch the two videos below to see Step 6 outlined in real time for you...
Strawberry Fairy Rock Painting Tutorial
PART 1
"How to Print an Image from a Word Processing Document"
Strawberry Fairy Rock Painting Tutorial
PART 2
"How to Resize an Image in Word Processing"
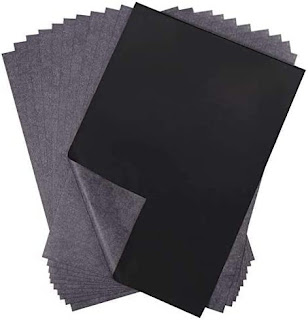
7.Place a piece of graphite paper (which is just like a carbon paper) between the rock's surface and the image you are going to trace. Make sure the graphite paper is facing the right way as there are two sides...
8.Secure both papers to the rock's surface with Scotch tape. See picture below...
9.Using a blue or red pen, trace the image by going over the outlines of the image you have secured to the rock.
10.Color your image in with paint pens, art markers, or Sharpies. You can also use acrylic paints and a brush if you want to paint the color onto the rock. I personally like the precision of art markers and pens for this step. Have fun!!!
11.Seal your rock with a weather resistant sealer. Give it at least three coats, letting it dry between each coat.
Hi there and thank you for your interest in this rock painting tutorial. I hope you will find it fun and informative.
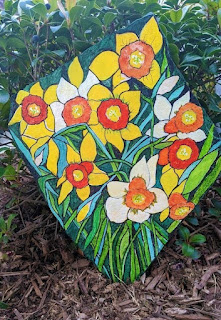
To make the rock pictured above I used a book called Trace & Paint Flowers(click to view on Amazon) which I purchased at my local Hobby Lobby craft store.
If you would like to make a rock like the one in this tutorial, just follow the DIRECTIONS as outlined below on this page.
The daffodils rockpictured at the top of this page is fairly large - approximately 18" high by 14" across at the widest points. I purchased the rock at a stone center near my home.
Most towns have a stone center nearby. A stone center is a great place to find large triangular shaped rocks to paint flowers onto because they usually have a pile of rocks that are broken which they will usually sell to the public at a discounted rate.
Just as a side note, you can also purchase rocks that are ready to be painted on Amazon now. The rocks you can purchase online are smaller than the ones you can find in a stone center. Click the link under the picture below to learn more...
For this particular large daffodil rock painting project, the rocks pictured above are too small, but they are great for smaller painted rock projects like the one pictured here...
DIRECTIONS
1. Paint your rock with two coats of white acrylic paint. Let it dry thoroughly.
2. Place a piece of transfer paper on the surface of your rock, and then lay your flower outline over your rock.
Secure both papers with Scotch tape and trace the image with a blue or red pen so that it will be easy to see the lines that have been traced. The transfer paper is underneath the daffodil outline in the image below...
This is the daffodil image secured to the rock's surface with the carbon paper in between
Outline of daffodils after it has been traced and painting has been started
4. Using paint brushes and acrylic paints, paint pens, or permanent markers, add color to the outline of daffodils on your rock's surface and have fun!
5. Once it is dry, go over any outlines and give it a touch up. Seal your rock with a weather resistant acrylic sealant following the directions on the can.
Supplies Side note: Not all the above products
will be needed for this particular tutorial. I have linked to some supplies
that I use in my rock paintings so that you can have access to some of my
favorite products, but you can find most of these in your local craft store.
Here are the links to other rock painting tutorials on this blog: