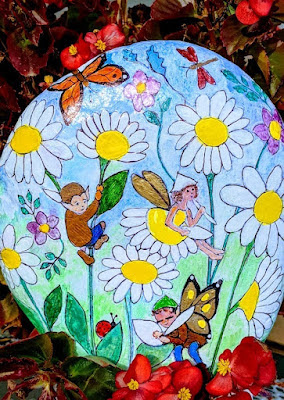
Hello and welcome to my blog all about the wonderful world of painting on rocks!
I painted my first rock when I was about 10 years old in upstate New
York while on vacation with my two best friends. Here is a link to the story of
the first rock I ever painted if you're interested..."My Rock Painting Journey"
If you are looking for a hobby or just want to try a new craft, painting
rocks can be a great way to express your creativity and bring many
hours of relaxation and joy to your life.
On this blog "Painting Rocks!" I will share with you the techniques I
use to paint my rocks in each one of the tutorials which are detailed on separate pages. Please refer to the
page linked above entitled 'Rock Painting Tutorials'.
The directions should be clear, and I think they will be well outlined
step-by-step for each rock painting (each tutorial is also linked below on this page) so that if you would like to create a similar rock it will be easy for
you to do.
If you have any questions, please leave a comment in the 'Comments' section and I will be happy to help!
Please visit my other blogs by clicking the link under each picture below...
Hi and thank you for being here for this rock
painting tutorial!
Using the stencil method I have outlined here in this
blog post makes it possible for anyone to paint a flower rock. There are
many different methods that can be used, but stencils really can simplify the process.
Rock painting has become a very popular pastime for
many people, young and old (and in between, haha!). It's a great hobby that you can enjoy by yourself or one you can share with your family and friends.
Below the video instructions, I have provided a list
of the SUPPLIES I used in this project with links to where you
can purchase them online for your convenience.
You can also purchase most of the supplies used in
this project tutorial at your local craft store like Michaels or Hobby Lobby(click on link to find store's weekly coupon).
Before you start...
For this rock art project, you will need to do a few
things before you actually color your flower design after stenciling it onto
the rock's surface in white paint.
Read the numbered DIRECTIONS below and then watch the videos
after that.
1. Find a rock you want to paint, making
sure it's the right size and shape for your image. Wash and dry your
rock.
2. Paint the rock with two coats of gray acrylic paintwith a foam paint brush. You
can also use black acrylic paint or
a dark green as well, as
long as the background looks like it could be found in nature. The gray
background makes it look like slate, but a dark green background can make it look
like the normal background in a flower bed in between leaves.
3. After the background is good and dry, take your flower stencil and place it on
top of the rock's surface. Use Scotch tape to secure
it to the rock so that the stencil will stay in place.
4. Using a stencil brush and
white acrylic paint, tap your image onto the dark background. This will
allow whatever color you are going to use to pop when you color over the
initial image that has been stenciled in white.
5. After the stencil design in white paint has dried, use your art pens to add
color. You can use Sharpies or Arteza Paint Pens or
whatever permanent ink you desire.
6. After your rock dries completely, spray with a weather resistant acrylic sealer at
least three times, allowing it to dry in between.
How to
Stencil Poppy Flowers
PART 1 - "Adding the Flowers Using White Acrylic Paint & Stencil"
PART 2 - "Adding Color to the Flowers over
the White Outline"
Supplies Sidenote: Not all of the above products will be needed for this particular tutorial. I have linked to some supplies that I use in my rock paintings so that you can have access to some of my favorite products, but you can find most of these in your local craft store.
Here are the links to other rock painting tutorials on this blog:
Looking for a fun gift for someone in your life? Check out my Zazzle store... I have t-shirts, coffee mugs, Christmas ornaments, phone cases, office accessories, just to name a few! Here's one of my ornaments....
Please visit my WEBSITES for more information about ROCK PAINTING:
Thank you for being here for this rock painting tutorial!
'Little Boy in a Bunny Costume' by nancymaggielee
By using my methods, anyone can learn how to paint rocks and turn them into beautiful decorative pieces of art. I sure hope you will give it a try!
In this tutorial, I will lay out for you step by step through outlines, video demonstrations and links to articles how I took an image (pictured below) and transferred it onto a rock. The result is the rock in the image above.
Sidenote: The videos or articles showing the process for this tutorial, 'Little Boy in a Bunny Costume'may use different images.
This is the picture I used to transfer to my rock for a base image to embellish
There may seem to be a lot of steps, but the process is fairly simple. You will be using Mod Podge gel medium to coat the image and let it dry onto the surface of the rock.
Also provided will be a list of supplies I used with links to where you can purchase them online for your convenience. Just as a sidenote, you can also purchase most of the supplies used in this project tutorial at your local craft store.
Please note that you may not need all of the supplies I included in the list below, but I wanted to include links to additional products to give you a choice and to demonstrate the wide variety of products that can assist you in creating beautiful painted rocks.
Before you transfer the image, you will need to do a few things to prepare your rock for the transfer of the image…
1. Find a rock you want to paint, wash and dry your rock.
After you find a picture you would like to transfer, you will have to download it into a word processing documentusing a simple copy and paste method which you can learn about by clicking the links below this paragraph.
(also called: Little Boy in Bunny Costume Rock - PART 2 - "Printing Extra Flowers onto Freezer Paper")
Are you ready rock painters??? Let's get started...here we go!
DIRECTIONS:
Read and follow the written directions in each STEP, and watch the videos linked in each STEP below for visual demonstrations. Make sure to refer to the articles and videos linked above the DIRECTIONS BEFORE moving forward.
In this video I will demonstrate the print commands for printing on a piece of freezer paper that you will have manually placed into the rear tray of your inkjet printer.
I filmed this in real time with my phone, so I apologize for the shakiness of the video. In any case I hope that you will find it helpful and informative.
Using ordinary kitchen freezer paper is a great way to get an awesome transfer of ink onto another surface, in this video I am using freezer paper to transfer an image onto a rock.
FYI...If you don't have freezer paper, I would just like to say that the image transfer method outlined in this rock painting tutorial also works using regular computer paper. The freezer paper works better, but both will work well.
You can buy pre-made freezer paper for your computer (also linked below in ‘RELATED VIDEOS' section) if you don't want to go through the process of making your own sheets and attaching them to computer paper to print.
However, if you would like to learn how to make freezer paper sheets for your computer, watch this video which will also be linked below (in the ‘RELATED VIDEOS' section). I believe that this is a more cost-effective way to go, but it's up to you.
In this video I will demonstrate how I took smaller pansy images that I had printed on freezer paper and added them to the outside edge of my rock.
Adding flowers to the edges, in my opinion, gives the painting more depth. It makes it look as though whoever is looking at the painting is seeing it from a distance, in other words peeking through the flowers in the meadow to see the bunnies and butterflies.
In this video I will demonstrate how to peel the paper back to reveal the images. Computer paper has about 7 layers, freezer paper too. While this process takes a while to get a great transfer of ink to the rock, it also takes great patience.
Supplies Sidenote: Not all of the above products will be needed for this particular tutorial. I have linked to some supplies that I use in my rock paintings so that you can have access to some of my favorite products, but you can find most of these in your local craft store.
Here are the links to other rock painting tutorials on this blog: